
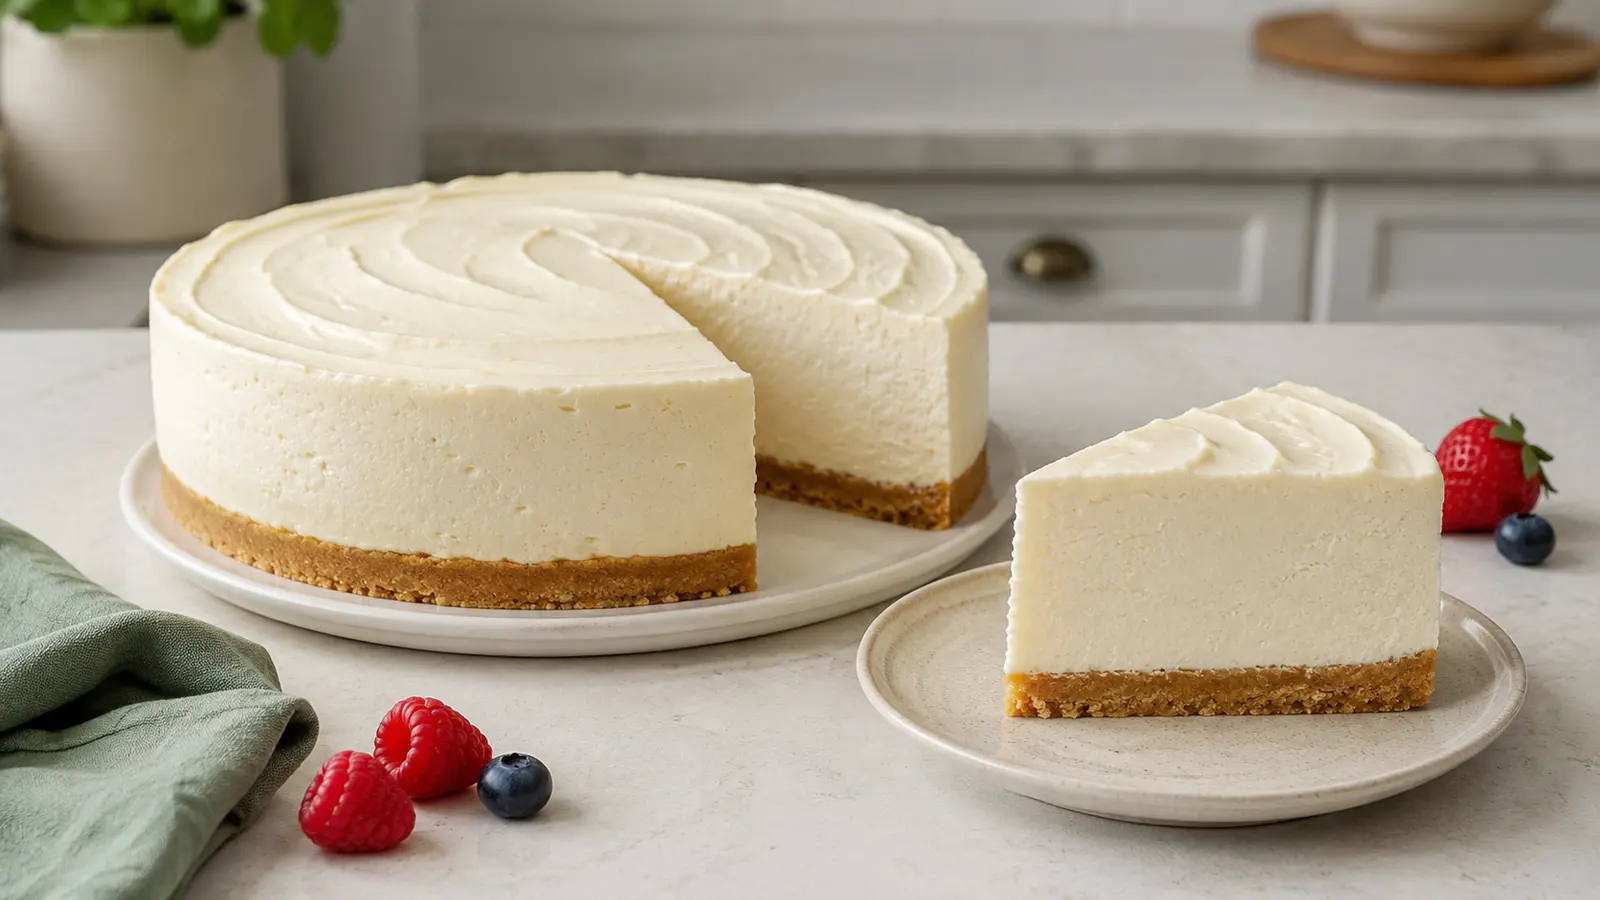
Use block-style full-fat cream cheese, whip cold heavy cream to medium peaks, fold gently and chill the filled 9-inch springform pan for at least 8 hours—12 is better for the cleanest slices.
Room-temperature cream cheese blends smooth; cold cream whips stable. The filling should mound softly before it enters the pan. Chill to refrigerator temperature, release with a warmed thin knife and keep this dairy dessert at 40°F or below.
A no-bake cheesecake is not baked cheesecake without the oven; its structure comes from concentrated cream cheese, aerated cream and cold fat. If the filling begins too warm, too loose or too aggressively beaten after the cream is added, time in the refrigerator cannot fully repair it.
This formula is intentionally made without gelatin for a creamy, mousse-like slice that still stands cleanly after a long chill. An optional gelatin note is included for hot rooms, transport or very sharp presentation, but the base recipe does not depend on it.
Plan the clock before you begin
- Prep
- 30 min
- Cook
- 0 min
- Chill / rest
- 12 hr
- Yield
- 12 slices
Ingredients, scaled to your table
Showing quantities for 12 servings. Scaling changes ingredient amounts, not pan size or cooking time.
Graham crust
Filling
Use the tool that controls the outcome
- 9-inch springform pan
- Parchment round
- Stand mixer or electric hand mixer
- Large flexible spatula
- Instant-read thermometer, optional but useful
- Thin sharp knife for slicing
Why each choice earns its place
Block cream cheese
Tub-style spread often contains more water and a softer stabilizer system. Full-fat blocks produce the most predictable set.
Powdered sugar
It dissolves without a gritty rest and contains a small amount of starch that supports the filling.
Sour cream
It gives acidity and a baked-cheesecake flavor. Too much adds free moisture, so keep the measured ratio.
Heavy cream
Whipping incorporates air and creates the light structure. It must be cold and should stop at medium peaks, not grainy butter.
Follow the change you can see—not only the timer
- 1
Prepare the pan
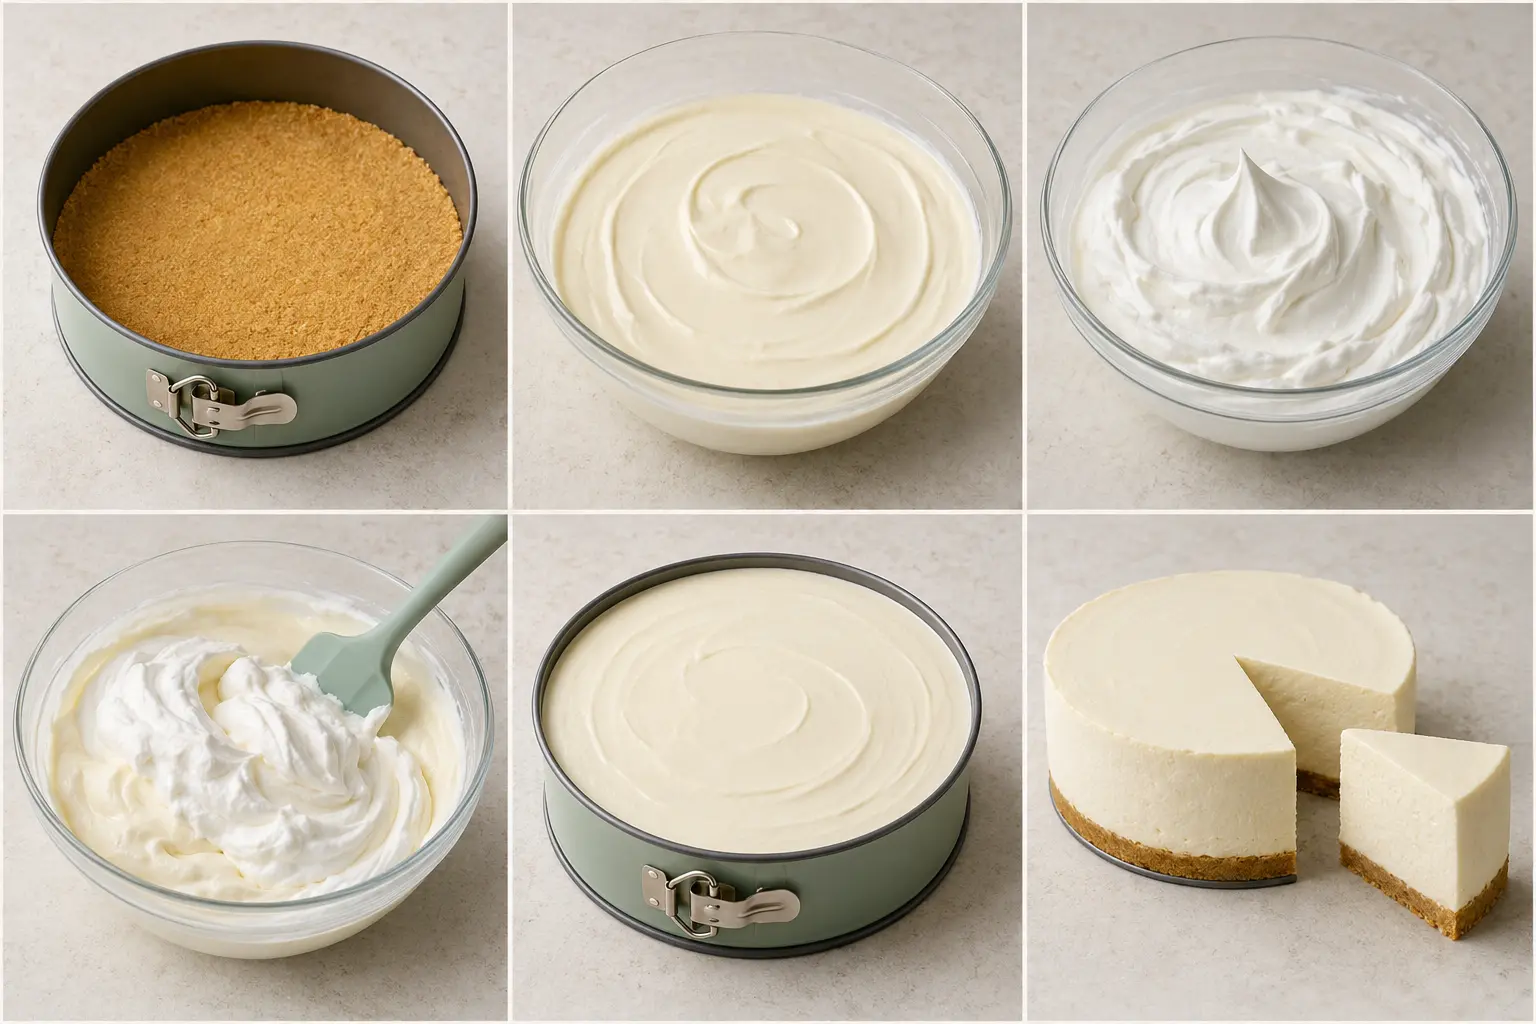
3 minLine the base of a 9-inch springform pan with parchment. Lightly grease only the exposed metal at the sides.
Look for: The parchment lies flat and the ring closes without wrinkling it.
- 2
Build a compact crust
5 minMix crumbs, sugar, salt and melted butter until the texture resembles wet sand. Press firmly across the base and 1–1½ inches up the sides using a flat-bottomed cup.
Look for: A squeezed handful holds together without leaking butter.
- 3
Chill the crust
15 minRefrigerate the pan while making the filling. A cold crust is less likely to lift when the filling is spread.
Look for: The butter has firmed and the surface does not shift under light pressure.
- 4
Smooth the cream-cheese base
4–5 minBeat room-temperature cream cheese on medium-low until smooth. Add powdered sugar, then sour cream, lemon, vanilla and salt. Scrape the bowl and stop as soon as uniform.
Look for: The mixture is glossy with no cold cheese beads and is not runny.
- 5
Whip the cold cream
3–5 minIn a clean cold bowl, whip heavy cream to medium peaks. The tip should bend over, while the body of the peak remains defined.
Look for: Tracks from the whisk hold; the cream still looks smooth, not clumpy.
- 6
Fold in three additions
2–3 minFold one-third of the whipped cream into the cheese base to lighten it. Add the rest in two batches, sweeping from the bottom until no white streaks remain.
Look for: The filling mounds from the spatula and slowly settles instead of pouring.
- 7
Fill without trapping gaps
3 minSpoon into the cold crust in several deposits, pressing gently to the edges. Smooth the top and tap the pan once or twice on a folded towel.
Look for: No visible tunnels remain at the side and the top is level.
- 8
Chill fully, then slice warm-and-clean
8–12 hrCover without touching the surface and refrigerate at least 8 hours; 12 hours gives the cleanest slices. Warm a thin knife under hot water, dry it, cut and repeat for every slice.
Look for: The center is cold, firm at roughly refrigerator temperature and a slice stands without slumping.
The four controls that matter most
Warm cheese, cold cream
Those opposite starting temperatures solve two different jobs: smooth blending and stable aeration.
Fold, do not re-whip
Once whipped cream enters, gentle folding protects the air and prevents a loose, overworked filling.
Time is an ingredient
The center needs hours to equilibrate to refrigerator temperature; a cold edge does not prove a cold center.
Clean cuts need a clean knife
Heat, wipe and dry the blade between slices rather than dragging crumbs through the filling.
Diagnose the result before changing the whole recipe
| What happened | Likely cause | Next-batch fix |
|---|---|---|
| Filling will not hold a mound | Warm cream, under-whipped cream or spreadable cream cheese | Chill the cream and bowl, use full-fat blocks and reach medium peaks before folding. |
| Small cream-cheese lumps | Cheese was still cold when mixed | Let block cream cheese soften evenly, beat it smooth before any cold ingredient enters and scrape the bowl. |
| Crust crumbles | Coarse crumbs, weak packing or too little butter | Process crumbs finely, verify the wet-sand squeeze test and compact with a flat cup. |
| Dense or greasy filling | Cream was over-whipped or the finished filling was beaten | Stop at medium peaks and fold with broad, slow strokes. |
| Slice slumps | Center is not fully chilled or ingredient ratios drifted | Chill overnight, measure by weight and keep cream cheese, sour cream and cream at the stated fat levels. |
Change the flavor without breaking the method
Warm-weather gelatin insurance
Bloom 1 teaspoon powdered gelatin in 1 tablespoon cold water, melt gently, temper with a spoonful of cheese base and blend it into the base before folding in cream. The texture will be firmer.
Lemon
Add 1 tablespoon finely grated lemon zest. Keep the juice at the measured amount so extra liquid does not loosen the set.
Chocolate
Fold 170 g cooled melted dark chocolate into the cream-cheese base before the whipped cream. Make sure it is fluid but not hot.
Berry swirl
Use a thick cooled berry reduction, not raw watery puree. Dot ⅓ cup over the filled pan and make only a few shallow swirls.
Protect the texture after the main method
- Best schedule: Make the cheesecake the day before serving. Add fresh fruit and wet sauces only after slicing or shortly before presentation.
- Refrigerator: Keep covered at 40°F (4°C) or below. For best quality, plan to eat it within 3–4 days and discard it if storage safety is uncertain.
- Freezer: Freeze uncovered until firm, then wrap airtight. Thaw overnight in the refrigerator. Freezing may slightly tighten or change the texture.
Short answers before you start
How long does no-bake cheesecake need to chill?
Plan for at least 8 hours. Twelve hours or an overnight chill gives the center more time to reach refrigerator temperature and usually produces cleaner slices.
Why is my no-bake cheesecake runny?
Typical causes are spreadable cream cheese, warm or under-whipped cream, too much sour cream or liquid flavoring, aggressive mixing after whipping, or cutting before the center is fully cold.
Can I make no-bake cheesecake without gelatin?
Yes. This base recipe uses full-fat block cream cheese and medium-peak whipped cream for structure. Gelatin is optional insurance for transport, a hot room or an especially firm presentation.
Can I use a store-bought crust?
Yes, but the filling quantity is designed for a deep 9-inch springform pan and may exceed a shallow prepared crust. Fill only to the rim and chill the extra in cups.
Can I freeze no-bake cheesecake to set it faster?
Freezing the outside does not guarantee the center has set evenly and may change the texture. Use the refrigerator for the initial set; freeze only for longer storage after it is fully chilled.
How long can cheesecake sit out?
FDA guidance for foods requiring refrigeration is no more than 2 hours at room temperature, or 1 hour above 90°F. When in doubt, discard it.
What supports the safety and publishing details
- FDA — Are You Storing Food Safely? ↗
Refrigerator temperature and perishable-food handling guidance.
- USDA FSIS — Refrigeration & Food Safety ↗
40°F refrigerator baseline and cooling guidance.
- Google Search Central — Recipe structured data ↗
Recipe markup and image recommendations.